
A Closer Look at Metal Watch Bands and How To Easily Size Them.
Posted by The Watch Prince on Jun 14th 2017
The Watch Prince™ offers a variety of Metal Watch Bands available with Straight Ends, Curved Ends, or Both. This article will highlight a few of our most popular Metal Watch Bands, and teach you how to easily size a metal watchband in just a few quick steps!
Featured Metal Straps:
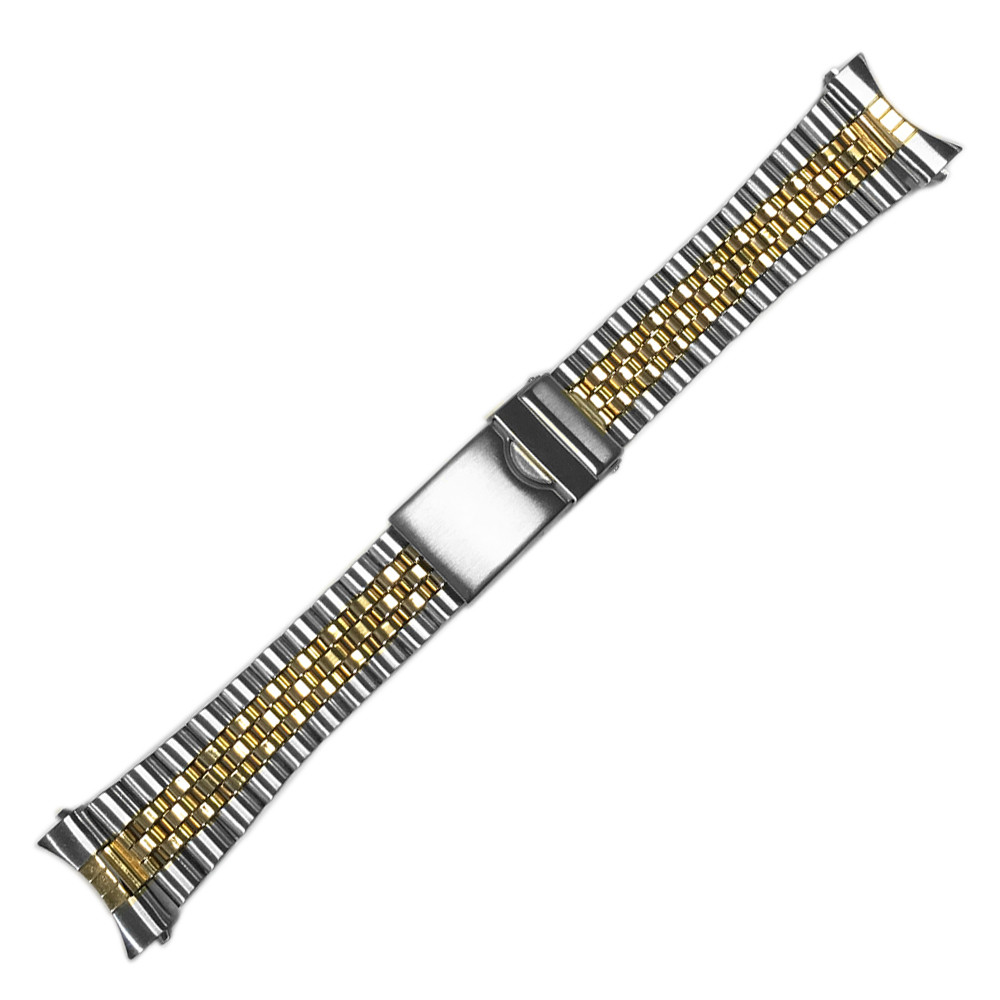
H-R Jubilee-Style (HR-MB569)
This Jubilee-style bracelet will make your watch look like new. A stainless-steel replacement bracelet from Hadley-Roma, this model ships with either Straight and Curved, or adjustable (squeeze) end pieces, allowing it to fit many watches with lug widths from 16mm to 22mm. This bracelet is nicely weighted and is not too heavy, yet not too light.
This strap is available in the following sizes:
18mm, 20mm, 22mm, or Adjustable (16mm-22mm)
This strap is available in the following finishes:
Dual Tone, Gold Tone, Silver
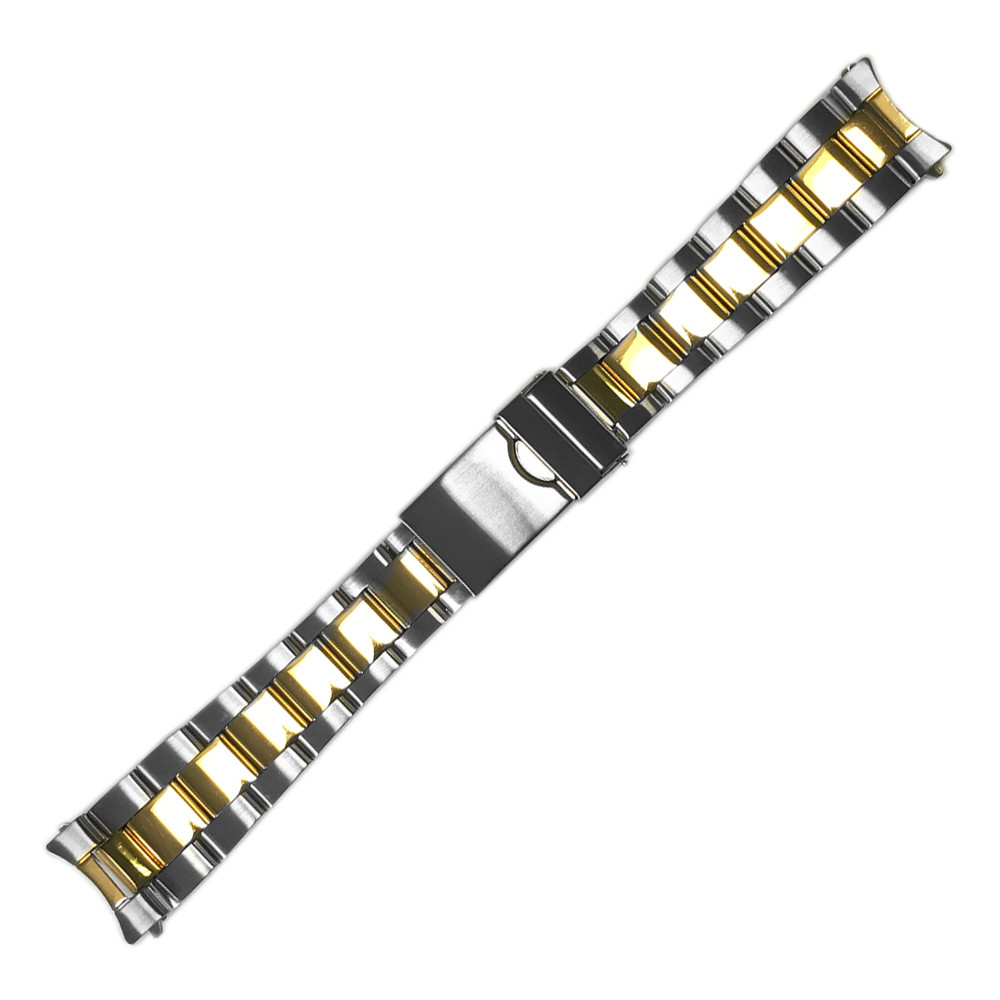
Oyster-Style Bracelet, Screw-Link (HR-MB401)
This Oyster-style bracelet will make your watch look like new. A stainless-steel replacement bracelet from Hadley-Roma, this model ships with either Straight or Curved end pieces. The Screw Link Design makes it easier to remove links and adjust the strap to your wrist size.
This strap is available in the following sizes:
20mm to fit Rolex Oyster
This strap is available in the following finishes:
Dual Tone, Gold Tone, PVD (Black)
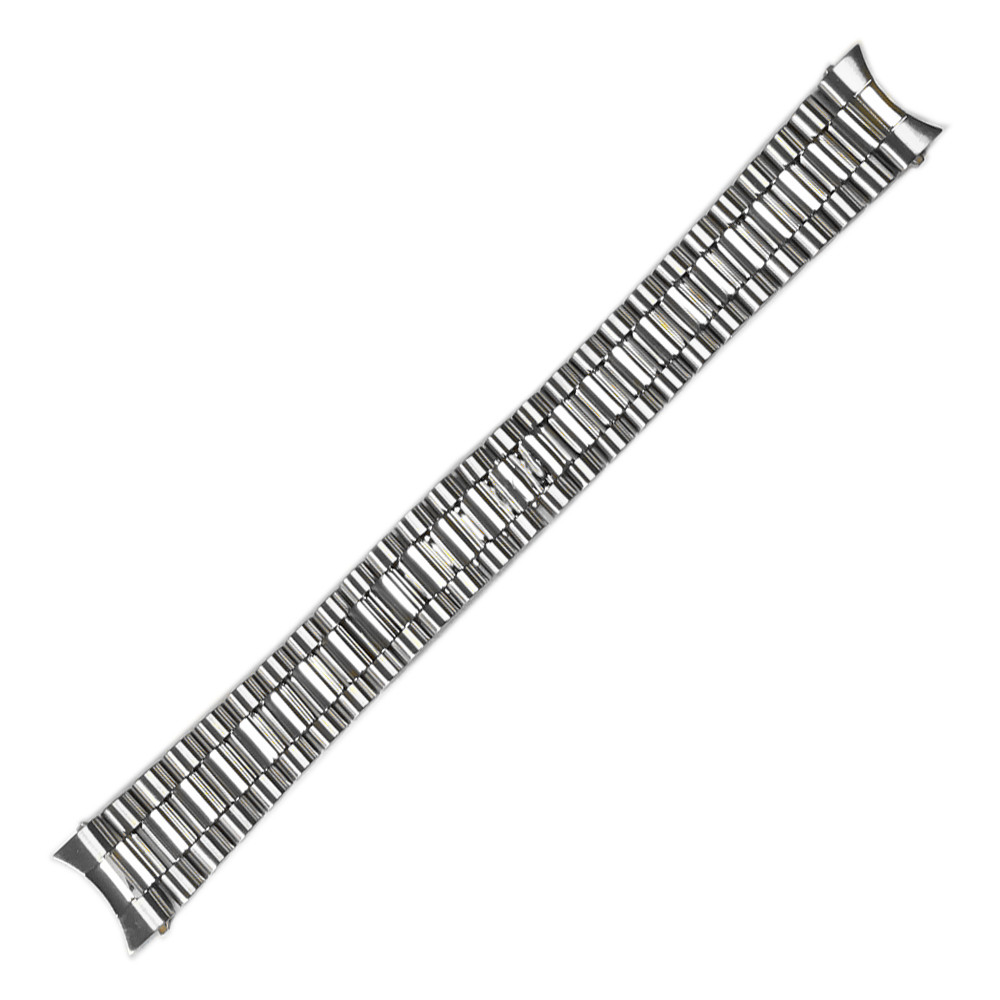
President-Style, Hidden Clasp (HR-MB422)
This President-style, fashion bracelet will make your watch look like new. A stainless-steel replacement bracelet from Hadley-Roma, this model has a hidden clasp for a sleek look and ships with either curved or curved and straight end pieces, allowing it to fit many watches.
This strap is available in the following sizes:
18mm and 19mm to fit Rolex Submariner
This strap is available in the following finishes:
Dual Tone, Gold Tone, Stainless Steel
HOW TO REMOVE LINKS:
These link-removal instructions were written for Hadley-Roma Black PVD Oyster-style watch bands. However, the same steps may be followed for most wrapped-link (aka folded-link) metal watch bands.
You will want to work on a firm surface, but avoid tables or desks that might be easily become scratched, dented or otherwise damaged. To protect both your watch and bracelet, you will want to place a protective cloth on your work surface to avoid scratching.

Step 1 – With your protective cloth under your watch band, turn it over so that you are viewing the interior, or back side of the bracelet. You should observe that links closest to the clasp have small openings with arrows (circled in red in photo) beside them. The arrow indicates the direction that you will be pushing the clip out of the link.

Step 2 – Looking more closely at the opening beside the arrow, you will be able to view part of the clip that you will need to push out.
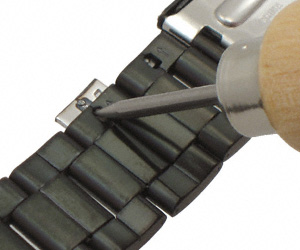
Step 3 – Removing the clip does require some force. Be sure to place the watch band on the protective cloth to avoid scratching. For your safety, it is best to have the arrow pointing away from you. While firmly securing the watch band with one hand, use the other to begin pushing the clip out.
In the photograph, we are using a Pin Pusher. Some use a screwdriver, pointed end of a spring bar tool, or other similar devices. Keep in mind that you may need to exert a fair amount of pressure to move the clip, so avoid using a device that might easily bend or break.

Step 4 – After pushing the end of clip out of the link, rotate the bracelet so that the clip is facing you. To complete clip removal, you will want to use needle nose pliers.

Step 5 – With the watch band firmly secured, use the needle nose pliers to pull the clip all the way out of the link. Be sure to pull the clip straight to avoid bending.

Step 6 – Once you pull the clip all the way out, the bracelet may be separated into two sections. To remove one link on this watch band, repeat the steps above on the link to left of the one just removed (nearest the clasp). To add links, follow the instructions for re-connecting the bracelet in Step 7, below.

Step 7 – (This would be same procedure for adding additional links) Once you have removed the link(s), it is time to reconnect the bracelet. Place the two sections together. Carefully line up the two links that are to be re-connected, and insert the clip. Without exerting excessive force, push the clip through the two links that you wish to connect. Often, you will not be able to push the clip all the way in. That is normal

Step 8 - Typically, the end of the clip will still be exposed (see area highlighted with red circle). One can push this in using several methods. We will often hold the bracelet so that the exposed end is facing down (into the workbench surface). Before proceeding to next step, make sure that you have protective cloth under the watch band, and that you don’t care about possibly denting the surface underneath.

Step 9 – While holding the bracelet so that the links and clip are perpendicular to the work surface, we tap the bracelet with a rubber mallet, which pushes the clip all the way into the links. To avoid potential damage, we let the clasp (and links on other side of the clasp), dangle off the edge of the work surface. This allows the pressure of the tapping to be exerted on the clip, not the side of the clasp.
Depending on your environment and ingenuity, there are a variety of ways to accomplish this last task. Regardless of your method, be sure to avoid scratching your watch band or subjecting the clasp to physical trauma.
If you are adding or removing more than one link, you will most likely want to balance the length on either side of the clasp. For example, if you are removing two links, you will remove one from either side of the clasp. This means that you will perform the above steps two times. If you are adding four links, you will want to insert two on each side of the clasp.